
Struggling with slow network speeds or overwhelmed by cyber threats? Wondering how to optimize your web traffic or enforce stricter access controls? Enter the Squid proxy server, a robust solution that’s more relevant than ever in today’s digital landscape. This comprehensive guide will unpack the ins and outs of the Squid proxy server, offering insights on setup, security enhancements, and performance optimization. Whether you’re a seasoned IT professional or just getting started, discover how Squid can revolutionize your web experience.
What is Squid proxy?
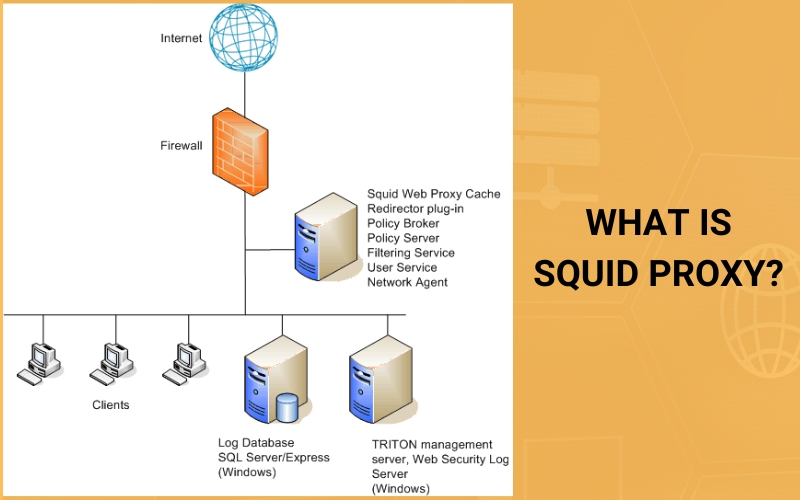
Squid proxy is a reputable and powerful open-source software, generously available at no cost under the terms of the GNU General Public License (GPL) from the Free Software Foundation. Originally crafted for Unix-based systems, today’s versatility of Squid ensures its compatibility even with Windows operating systems. The primary objectives of deploying a Squid proxy include alleviating bandwidth bottlenecks, enhancing web page loading times, and streamlining the flow of network traffic for optimal performance.
Proxy vs. Squid server
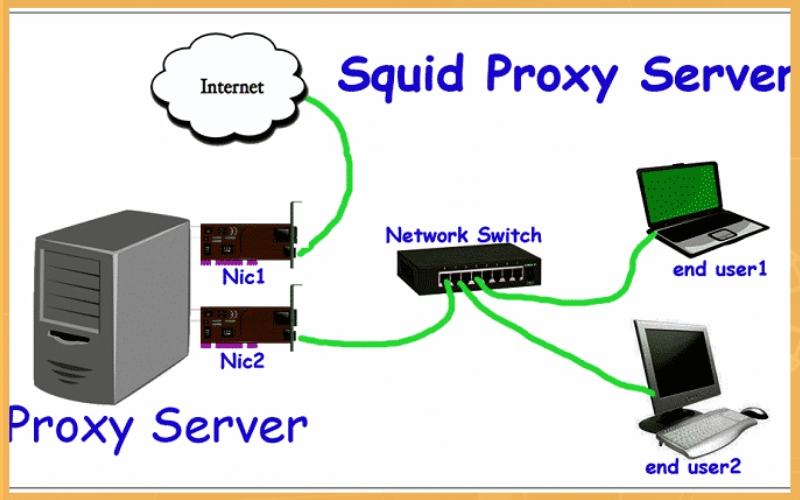
A proxy server, in its essence, is either a dedicated hardware device or a software module on a computer. It serves as a middleman between a user’s device, like a computer, and another server from which the user is seeking a service. Its job is to facilitate, relay, or even filter the requests and responses between these two entities.
On the other hand, Squid is a specific kind of proxy server, predominantly built for Unix-based systems. Its expertise lies in acting as a caching proxy for web content accessed via protocols like HTTP, HTTPS, and FTP. Its multifaceted utility makes it popular for various functions — from caching web content to enhance performance, to balancing the load on networks, filtering specific web traffic, and bolstering security mechanism
Main Functions of Squid Proxy
1. Caching: At the heart of Squid Proxy’s efficiency is its caching capability. This function allows the proxy to store frequently visited web content in its cache memory. When users request specific content, Squid first checks its cache. If the content exists there, Squid can quickly serve it up, slashing response times and conserving network bandwidth.
2. Forwarding: Beyond just caching, Squid Proxy acts as a go-between, forwarding client requests to web servers. After fetching the requested content from the server, it then returns it to the client. This role not only enhances security but also paves the way for other services like content filtering, access control, and overall traffic optimization.
3. Access Control: With Squid Proxy, administrators gain granular control over internet access. Through its comprehensive access control mechanisms, they can set policies to restrict or grant access based on specific clients, IP addresses, or types of content. This helps organizations maintain internet usage standards, fend off malicious websites, and ensure only authorized accesses.
4. Authentication: Security and accountability are paramount in today’s digital environment. Squid Proxy stands up to the task with support for various authentication protocols, from simple username/password combinations to more advanced methods like NTLM and LDAP. Through these, administrators can set up user-centric access controls and even monitor individual user activities.
5. Content Filtering: Squid Proxy can act as a gatekeeper, sifting through web content based on set rules or policies. This ensures that organizations can bar access to certain sites, manage the kind of content that’s downloadable, and shield users from harmful or unsuitable content.
6. Traffic Optimization: The internet isn’t just about access; it’s about quality of access. Squid Proxy’s suite of features, including protocol optimization, request and response modifications, and compression, ensure that network traffic flows smoothly. These tools work together to decrease lag and elevate the overall performance of the network.
Prerequisites
Before diving into the tutorial and its hands-on demonstrations, it’s imperative to ensure you’re adequately prepared. Here’s a checklist of what you’ll need to effectively follow along:
1. Linux Server:
- Type: Ubuntu 22.04
- IP Address: 192.168.5.15
- Hostname: ata-ubuntu
2. User Permissions:
You should be operating as a non-root user who has been granted sudo or root privileges. This is crucial to perform certain administrative tasks and modifications throughout the tutorial.
3. Client Machine:
- Operating System: Linux Mint
- Web Browser: Mozilla Firefox
With these prerequisites in place, you’re all set to proceed with the tutorial!
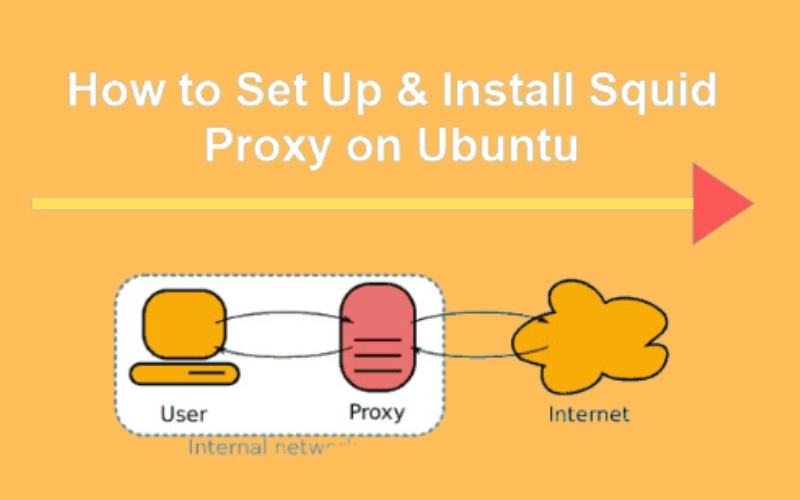
Installing Squid Proxy on Ubuntu
Squid stands out as a versatile HTTP proxy and caching solution, compatible with the majority of Linux/Unix platforms. While there are various package managers at your disposal for installing Squid, such as Nala Apt, this guide emphasizes using Ubuntu’s trusted APT package manager.
To get Squid Proxy up and running on Ubuntu, here’s a step-by-step breakdown:
1. Refreshing the Package List:
Begin by launching your terminal.
Input the following command to update the package list and ensure you’re fetching the latest versions:sudo apt update
2. Installing Squid:
Once the package list is refreshed, proceed with installing Squid using:sudo apt install squid
3. Verifying the Squid Service:
With Squid in place, it’s essential to ascertain it’s functioning as expected.
Use:sudo systemctl status squid
If all went well, you’d notice the status “active (running)” for squid.service. This means Squid is all set to kick into action every time you boot up your system.
4. Testing the Cache Functionality: (Note: There seems to be a gap as step six is missing. Assuming it pertained to visiting a URL for the first time.)
Execute the command from the unmentioned step six to revisit a previously accessed URL.
During this revisit, the X-Cache and X-Cache-Lookup indicators should show “HIT”. This is your cue that Squid has done its job, caching the webpage, ensuring faster load times on subsequent visits.
Configuring Squid as a Web Proxy and Cache Server
Having successfully installed Squid, it’s high time you witnessed its capabilities firsthand. One of the primary reasons for integrating Squid is to boost content delivery speeds across your local networks. Wondering how to achieve this?
By configuring Squid correctly, it serves as a conduit that permits a closed network or individual client to interface with the internet through the HTTP protocol. Concurrently, it retains a cache of accessed URLs, storing them either in memory or on the system disk.
To morph Squid into a potent web proxy and cache server, follow these steps:
1. Access the Configuration File:
- Utilize your preferred text editor to open the default Squid configuration located at /etc/squid/squid.conf.
2. Designate the Port:
- Navigate to the http_port 3128 line within the file.
- Append your server’s IP address followed by the designated port for Squid’s operation.
3. Toggle the Disk Cache:
- Activate disk caching by uncommenting the cache_dir parameter.
- While Squid’s default modus operandi leverages memory for caching, this modification enables disk-based caching, specifically in the /var/spool/squid directory.
4. Integrate New Configuration:
- Insert the stipulated configuration segment between the lines include /etc/squid/conf.d/*.conf and http_access deny all.
- The integrated settings establish a fresh Squid Access Control List (ACL) labeled ‘mynet’ for the network 192.168.5.0/24. This ACL is granted web access through the http_access parameter.
- Conclude your edits by saving and closing the /etc/squid/squid.conf file.
5. Reboot the Squid Service:
- Activate the following command to restart Squid and usher in your changes.
- A point worth noting: Restarting the Squid service is a silent operation, yielding no terminal feedback.
6. Test Your Configuration:
- Utilize the given curl command to engage a website (in this instance, http://duckduckgo.com) via both cURL and the proxy, thus validating Squid’s operationality. The flags ‘x’ and ‘I’ denote proxy usage and HTTP header display, respectively.
Should Squid function optimally, your results will exhibit:
- The descriptor Via: 1.1 ata-ubuntu (squid/5.2) within HTTP headers. Here, ‘ata-ubuntu’ is your Squid server’s hostname.
- The Squid cache indicators, X-Cache and X-Cache-Lookup, will, upon your maiden URL visit, register ‘MISS’ values, signaling a fresh fetch.
Setting Up a Squid Basic Authentication
While your Squid Web Proxy and Cache Server is operational, bolstering its security should be top priority. Implementing authentication for Squid ensures only authorized users can access its services.
While Squid boasts compatibility with numerous authentication backends such as SQL databases, LDAP, NIS, Radius, and NSCA, this guide will focus on basic authentication.
Steps to Activate Basic Authentication on Squid:
1. Install the Necessary Package:
- Execute the subsequent command to incorporate the apache2-utils package.
- This inclusion equips you with the htpasswd utility, facilitating password generation for Squid’s authentication.
2. Initiate and Assign File Ownership:
- Implement the succeeding commands to craft a fresh file dubbed /etc/squid/passwd and allocate its ownership to the ‘proxy’ user.
- While no feedback is issued post-execution, remember that /etc/squid/passwd becomes the repository for Squid’s authentication credentials.
3. Create an Authentication User:
- Invoke the htpasswd command as indicated below to institute a user labeled ‘alice’ (this is flexible).
- Promptly furnish a robust password for ‘alice’ upon request. Successful completion means the credentials are secured within /etc/squid/passwd.
4. Modify Configuration File:
- Reaccess the /etc/squid/squid.conf file and interject the delineated configuration as exhibited in the supplementary visual guide.
- The injected configuration spawns a novel Squid ACL titled ‘authusers’ which admits access to Squid solely for authenticated entities. For illustrative purposes, the basic_ncsa_auth method will be harnessed, referencing the /etc/squid/htpasswd password repository.
5. Restart Squid:
- Promptly execute the systemctl command to reboot Squid, applying the adjustments.
6. Validate the Authentication:
- Utilize the provided curl command to reach a website (namely, https://duckduckgo.com) while supplying designated Squid user credentials (in this instance, alice:password).
- A triumphant authentication will escort you to the desired URL, depicted in the attached imagery.
Conversely, an unsuccessful authentication attempt will yield feedback, encompassing:
- “407 Proxy Authentication Required.”
- “X-Squid-Error: ERR_CACHE_ACCESS_DENIED 0.”
This enhanced authentication layer ensures your Squid server remains accessible solely to authorized users, thus augmenting its security
Blocking Websites with Squid Proxy
While Squid is often recognized for its robust authentication, it also shines in content filtering capabilities. It empowers administrators to shield local networks from undesirable or potentially harmful websites.
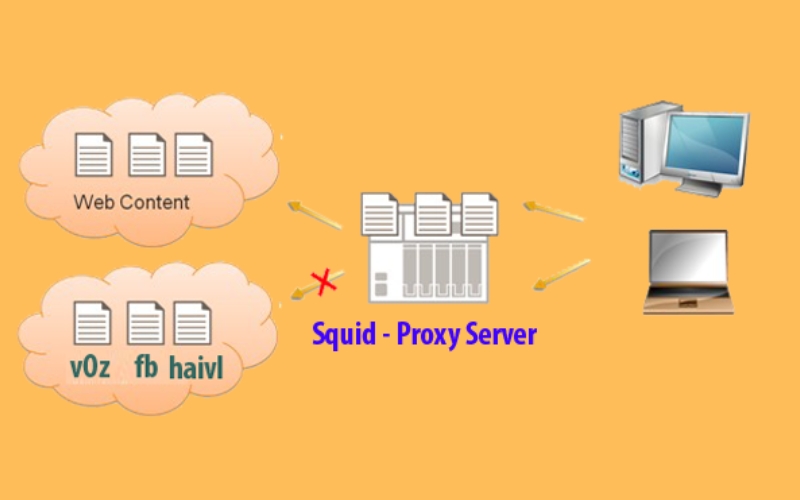
A flagship feature of Squid is its ability to block websites, leveraging Access Control Lists (ACLs).
Guide to Block Specific Websites using Squid:
1. Update Squid Configuration:
- Navigate to the standard Squid configuration located at /etc/squid/squid.conf. Input the provided configuration details into this file, save your modifications, and then exit.
- This alteration spawns a fresh ACL named blocked_websites. With the http_access deny parameter, it prevents access to specified websites.
2. Implement Changes:
- Swiftly run the highlighted command to restart the Squid service, ensuring the recent changes take effect.
3. Test the New Settings:
- Use the subsequent curl command to attempt access to http://youtube.com, a site now on the blocklist, to verify the efficacy of your configuration.
- A successful block will result in the display of a “403 Forbidden” error, accompanied by the “X-Squid-Error: ERR_ACCESS_DENIED 0” message.
Configuring Squid Proxy on the Client Machine
Once you’ve established a Squid proxy server with caching and authentication features, the next step is to integrate it with client devices. While there are numerous ways to accomplish this, a direct method is to utilize a browser’s GUI settings, such as Mozilla Firefox.
Here’s how to set up Squid Proxy in a client’s Mozilla Firefox browser:
1. Access Firefox Settings:
- Start Mozilla Firefox.
- Click the preferences icon, typically situated at the top right corner.
- From the dropdown, opt for “Settings”.
2. Dive into Network Configurations:
- Scroll to locate the “Network Settings” portion and select the “Settings” button adjacent to it.
3. Manual Proxy Configuration:
- Choose the “Manual proxy configuration” radio button.
- For the “HTTP Proxy” field, key in the IP address of your Squid server (e.g., 192.168.5.15).
- Input “3128” (or your designated Squid port) into the “Port” section.
- Ensure the “Also use this proxy for HTTPS” checkbox is selected, applying the same proxy settings for HTTPS traffic.
4. Test Authentication:
- Attempt to access a common website, like wikipedia.org.
- A Squid authentication prompt will emerge.
- Enter your Squid credentials and proceed by clicking “Sign In”.
5. Verifying Website Restrictions:
- Navigate to a site restricted by Squid, for instance, https://youtube.com.
- Upon successful restriction, a notice reading “The proxy server is refusing connections” will be displayed.
In conclusion, the Squid proxy server offers an unparalleled avenue for optimizing web traffic, bolstering security, and customizing user access. By mastering its myriad of features, you can elevate your network’s efficiency and safety. We hope this guide has shed light on its potential and how-to’s. Dive deeper into the world of tech with more insightful blogs from Twistory, your trusted source for all things digital.
