
Synchronizing iMessage across your Apple devices not only allows you to access your message history on your Mac, but it also provides a convenient way to manage your messages. However, this feature can lead to a cluttered message history, making it difficult to locate important conversations and potentially slowing down your Mac. Therefore, understanding “How To Delete Messages On Mac” can significantly improve your messaging experience.
This guide will walk you through the steps on how to delete messages on your Mac and will also introduce some useful apps that can enhance your messaging experience.
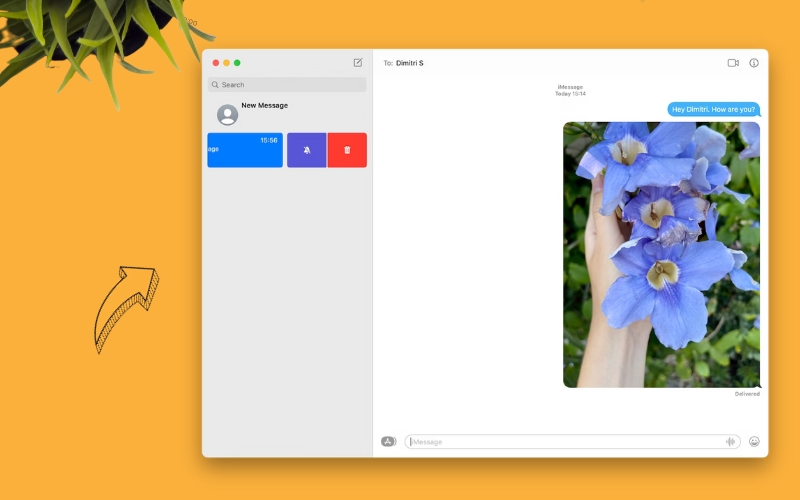
How to Delete a Single iMessage on Mac
Before we dive into the process of “How To Delete Messages On Mac”, let’s clarify a few points you might be interested in.
Does deleting texts on Mac cause them to disappear from all devices?
The answer depends on your settings. If you have message synchronization activated in your account, the messages will be wiped from all devices. If it’s deactivated, the messages will only be removed from your Mac.
Will the texts be erased from the recipient’s Mac, iPhone, or iPad?
No, the deletion is only applicable to your device. The messages will remain on the recipient’s device until they decide to delete them.
Now, let’s delve into the process of “How To Delete Messages On Mac” by erasing an iMessage:
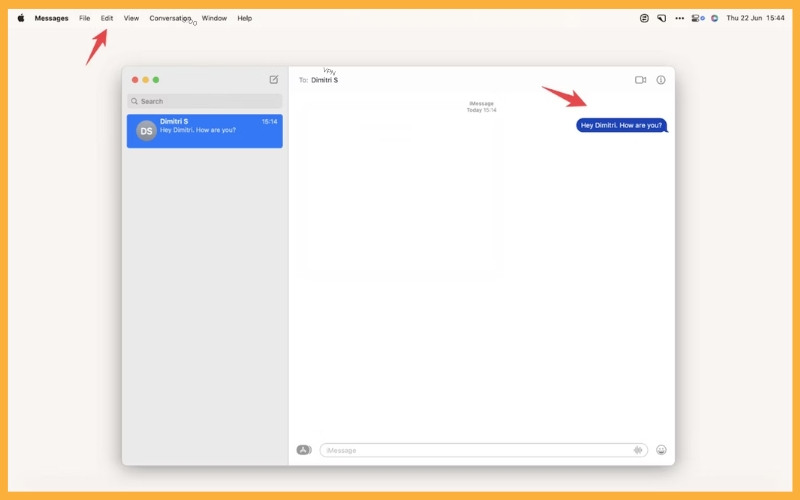
- Click on the Messages app icon located in your Dock.
- Select the messages you wish to erase (they will be highlighted in dark blue).
- Navigate to Edit in the top menu bar, select Delete, and confirm your action.
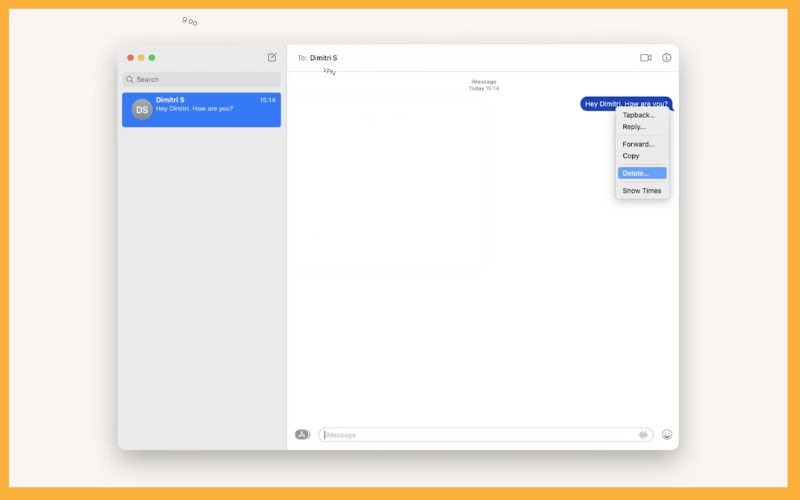
There’s also a second method that involves using the context menu:
- Perform a right-click with your mouse or a two-finger click in the lower right corner of the touchpad.
- Select Delete from the context menu.
How to Delete Multiple Messages on Mac
If you’re looking to erase multiple messages at once on your Mac, rather than selecting each message individually, you can do so with the following steps:
- Hold down the Command key and click on each message you wish to erase.
- Perform a right-click (or with two fingers, tap the bottom right corner of the touchpad) and choose Delete. Alternatively, after selecting the messages, you can click on Edit in the top bar and select Delete from the dropdown menu.
How to Delete Attachments from Message
Attachments such as photos, videos, documents, and others that you’ve sent or received via iMessage on your Mac can take up a significant amount of storage space. If you’re sure you won’t need these attachments in the future, it’s advisable to delete them as part of the process of how to delete messages on Mac. However, if there’s a chance you might need them later, it’s a good idea to create a backup before proceeding with the cleanup.
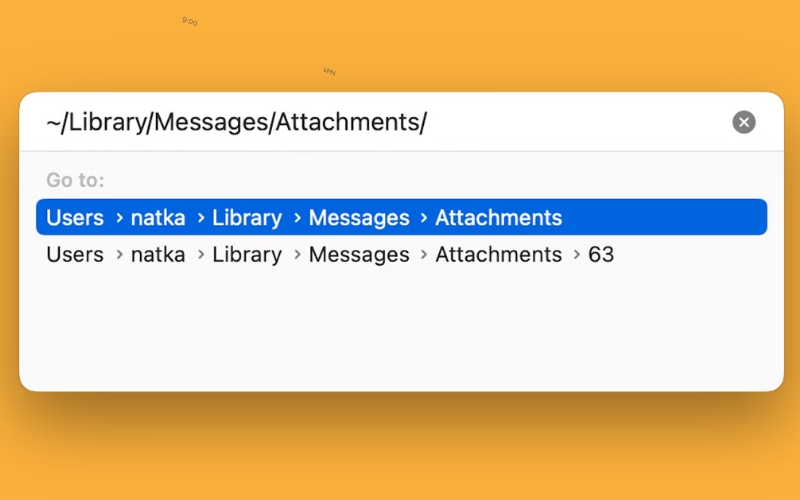
Here’s how to remove attachments from Messages:
- Open Finder and press Command + Shift + G.
- In the pop-up window, enter ~/Library/Messages/Attachments and hit Enter.
- Delete the files and folders within the Attachments folder.
- Once you’ve removed the attachments, don’t forget to empty the Trash.
How to Clear iMessage Transcripts
Clearing transcripts will remove all files from the conversation that have ever been exchanged, including photos, texts, videos, documents, and so on. This can be accomplished in two simple steps:
- Open the conversation you wish to clear.
- Navigate to Edit > Clear Transcript and confirm your decision.
How to Automatically Delete Messages in macOS
If you prefer not to store messages and would like them to be automatically cleared over time, here’s how to set up automatic deletion of texts on your Mac:
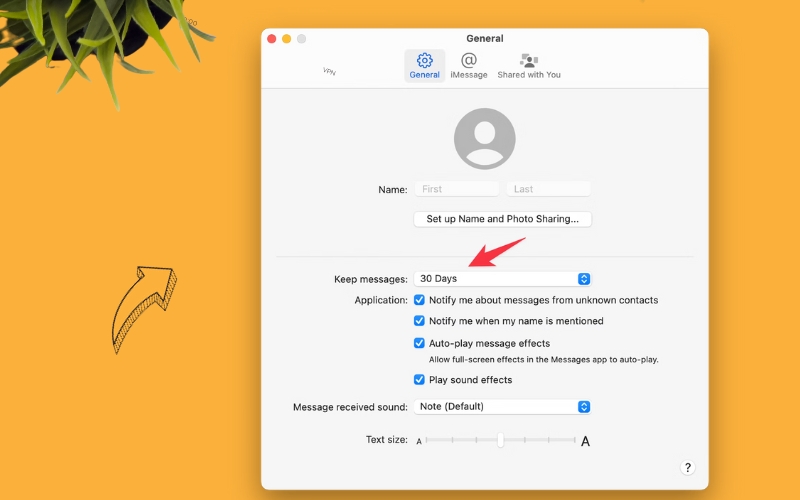
- With the Messages app open, click on Messages in the top bar and navigate to Preferences.
- In the General tab, locate the Keep messages section. Open the dropdown menu and select your preferred time frame: either 30 days or one year.
- Once you’ve confirmed your selection, your messages will be automatically deleted after the specified period.
How to Permanently Delete All iMessages on Mac
If you have a multitude of conversations and wish to permanently erase all messages, using Terminal or Finder on your Mac is the most efficient method. However, if you only have a few conversations, manual deletion might be a more suitable option.
Here’s how to permanently erase conversations on your MacBook:
- Start by selecting the conversation you want to delete by clicking on it, then swipe left on the touchpad using two fingers. This action will slide the conversation to the side, revealing a trash bin icon next to it.
- Alternatively, you can right-click on the conversation you want to delete to open the context menu and select Delete Conversation.
- Finally, empty the Trash.
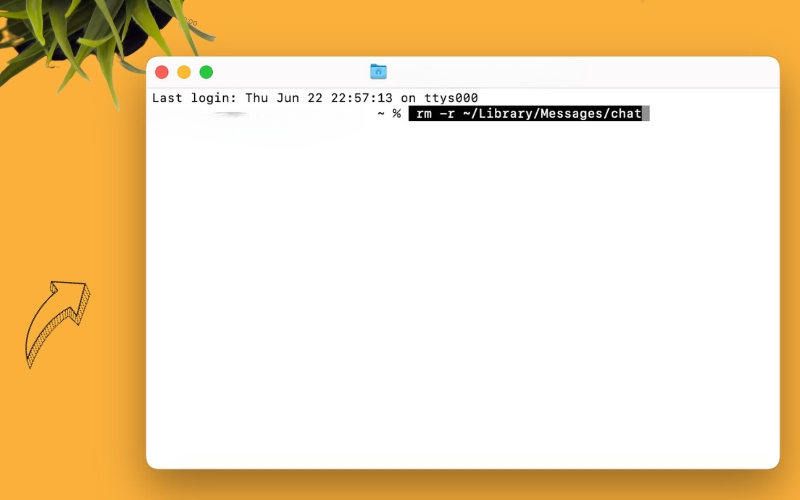
How to Use Terminal to Remove Messages on Mac
If you’re looking to permanently delete messages and files from your Mac without sending them to the Trash first, Terminal is an effective method. This ensures that the deleted items are immediately removed, bypassing the Trash, and cannot be recovered. This process is a part of the guide on “How To Delete Messages On Mac”.
Here’s how to erase messages on your MacBook using Terminal:
- Navigate to Finder, click on Go > Utilities > Terminal.
- Enter the following command to erase messages: rm -r ~/Library/Messages/chat and press Enter.
This command will clear all your messages, but the attachments will still be preserved. If you don’t need the attachments, you can remove them with another command:
In Terminal, type rm -r ~/Library/Messages/Attachments/?? and press Enter.
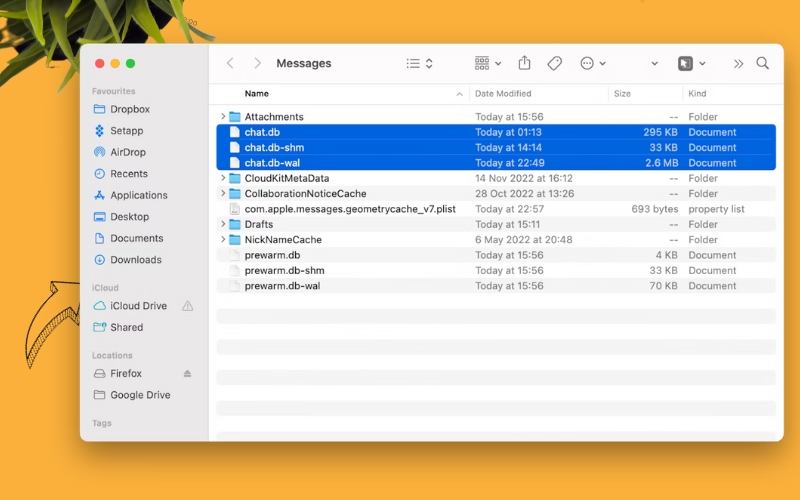
How to Clear Multiple Messages from Finder on Mac
If you’re looking to erase all messages simultaneously, the following method using Finder can be quite effective:
- Minimize all active windows and click on the desktop so that Finder appears in the upper left corner.
- Press Command + Shift + G.
- In the pop-up window, enter ~/Library/Messages and hit Enter.
- Locate the files named chat.db, chat.db-wal, chat.db-shm, right-click on them, and select Move to Trash.
This action will remove all the texts but not the attached files. To delete them as well, you can remove the Attachments folder (usually displayed at the top of the list).
Since the files and texts are now in the Trash, remember to empty it to permanently delete them.
How to Delete All Messages from iCloud
Now, let’s delve into iCloud, which has the capability to store your data. It’s crucial to note that messages from your Mac are only saved to iCloud if you’ve enabled this feature. To check this, follow these steps: Click on Messages (on the top bar; it’s active when the Messages app is open) > Preferences > iMessage. If synchronization is enabled, you’ll see a tick next to “Enable Messages in iCloud”.

If you deselect this option, your messages will be downloaded to your Mac and won’t be synchronized with iCloud in the future.
Final Thoughts: How To Delete Messages On Mac
Twistory hopes that this guide on “How To Delete Messages On Mac” has been beneficial in teaching you how to manage messages on your Mac. The most common built-in methods include deleting texts directly from the Messages app, and utilizing Terminal or Finder. Additionally, you can configure automatic cleanup to occur every 30 days or annually. This ensures your messaging environment remains organized and clutter-free. For more interesting and informative content, don’t forget to follow Twistory.net.
>See more related articles:
- How to Take Screenshots on Mac: Simple & Effective
