
Ever found yourself grappling with slow internet speeds or unwanted redirections on your Windows 10 PC? Could a proxy server be the culprit behind your connectivity woes? You’re not alone!
Many users often find the need to modify or disable their proxy settings. Dive into this guide to learn ‘how to disable proxy server Windows 10‘ quickly and effortlessly. Don’t let a proxy stand in the way of your smooth browsing experience!
How to disable proxy settings in Windows 10
There are several methods to permanently turn off proxy settings on a Windows 10 machine. Here’s a step-by-step guide to three such techniques:
Disable network proxy through Control Panel
To modify proxy settings via the Control Panel on your Windows 10 computer, follow these steps:
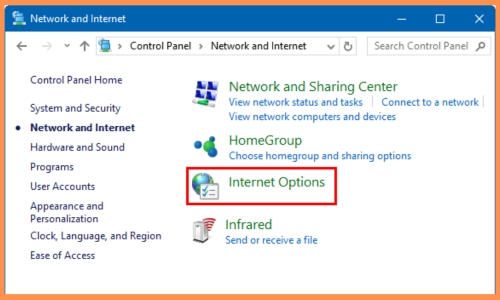
- Navigate to: Control Panel > Network and Internet > Internet Options
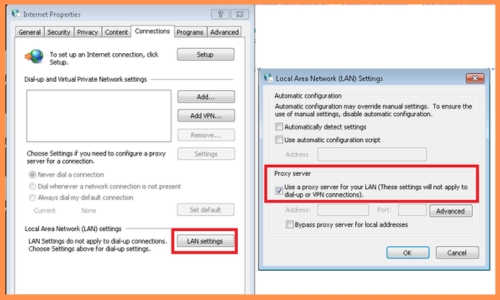
- Inside the Internet Properties dialog, go to the “Connections” tab, and then select “LAN settings.”
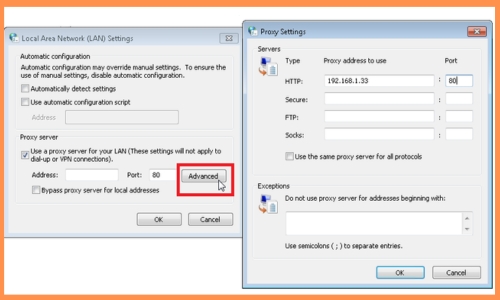
- In the Local Area Network (LAN) Settings dialog, deselect both “Automatically detect settings” and “Use a proxy server for your LAN.” Click “OK.”
- Conclude by clicking “Apply” followed by “OK” in the Internet Properties window.
This method only modifies proxy settings for the current user account. To disable proxy settings for other users on the same machine, repeat the process in each account, or read on to learn about system-wide changes.
To revert the changes, revisit the aforementioned location and reselect the boxes you previously deselected.
Disable network proxy using Settings app
The Settings app has become a primary configuration hub in Windows 10. You can disable proxy settings using this app:
- Press the Windows key + X, then choose “Settings.”
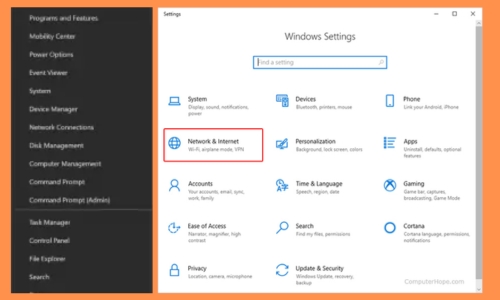
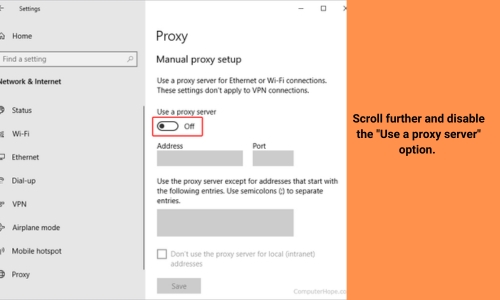
- Navigate to “Network and Internet” and select “Proxy.”
- Under “Automatic proxy setup,” toggle off “Automatically detect settings.”

- Scroll further and disable the “Use a proxy server” option.
This action disables proxy settings for the current user. For a system-wide adjustment, refer to the next method.
To reverse these settings, navigate back to the proxy settings and toggle on the options you initially turned off.
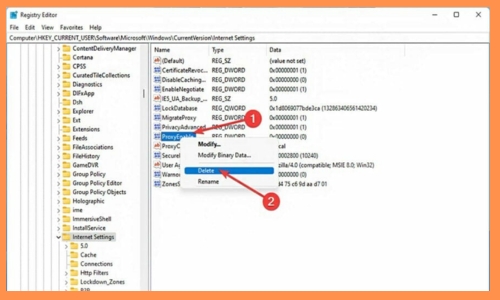
Disable system-wide network proxy using Registry Editor
The Registry Editor allows for extensive system-wide modifications. As changes here can impact system functionality, we advise creating a system restore point before proceeding.
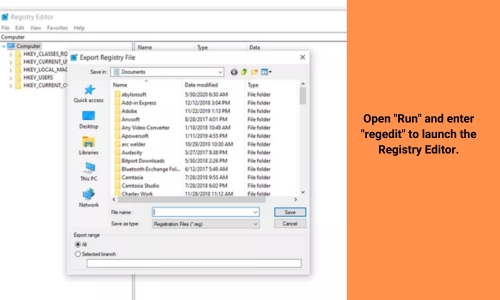
- Open “Run” and enter “regedit” to launch the Registry Editor.

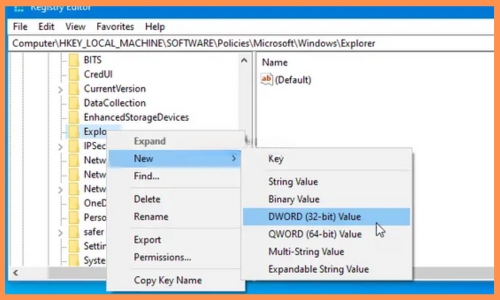
- In the left pane, navigate to: HKEY_Local_Machine > Software > Policies > Microsoft > Windows > CurrentVersion > Internet Settings
- Right-click on “Internet Settings”, hover over “New,” then select “DWORD (32-bit) Value.”
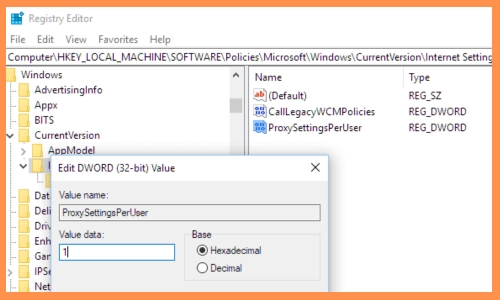
- Rename this new DWORD entry as “ProxySettingsPerUser.”
- Double-click the “ProxySettingsPerUser” DWORD, set its Value Data to “1,” and then click “OK.”
- Restart your computer to implement the changes.
This action deactivates proxy settings for all users on the system, ensuring network traffic directly accesses the internet without passing through a proxy.
To revert this, simply remove the “ProxySettingsPerUser” DWORD you’ve created and reboot the computer.
How to disable proxy settings in Windows 8
For enhanced security or administrative reasons, Windows 8 users might wish to prevent other users from altering proxy settings. Here’s a concise guide on accomplishing this via the Local Group Policy Editor:
- Step 1: Launch the Local Group Policy Editor.
Access this by searching for “gpedit.msc” from the Start menu and pressing Enter.
- Step 2: Navigate to the “Prevent changing proxy settings” option.
Follow this path: Computer Configuration > Administrative Templates > Windows Components > Internet Explorer > Prevent changing proxy settings.
- Step 3: Modify the setting.
Within the properties of “Prevent changing proxy settings”, select “Enabled.” Afterward, click “OK.”
- Step 4: Conclude the process.
Close the Local Group Policy Editor and reboot your PC to ensure the changes take effect.
In essence, upon following these steps, you’ll restrict others from tampering with or modifying the proxy settings on your computer.
In wrapping up, mastering ‘how to disable proxy server Windows 10’ can be pivotal for an unobstructed and speedy internet experience. Thanks for trusting Twistory with your tech queries. If you found this guide useful, don’t miss out on our other insightful blogs that can help you navigate the world of tech with ease and confidence. Stay tuned with Twistory for more updates and tech solutions!
