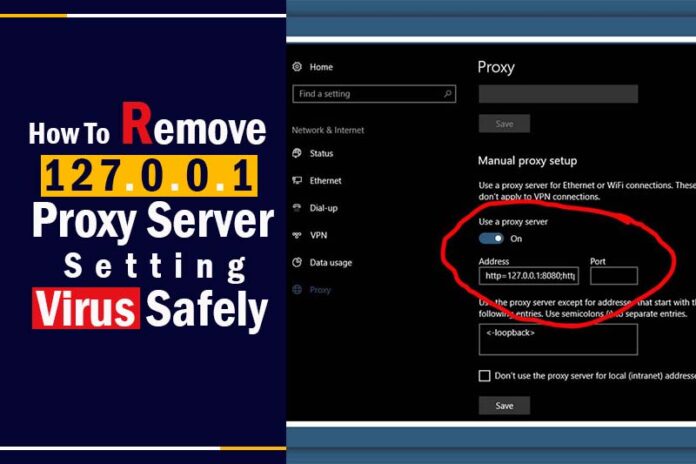
Are you frequently encountering disruptions due to the 127.0.0.1 proxy server setting virus? Wondering how to reclaim your system’s full efficiency? You’re not alone. Many users are grappling with this pesky issue, seeking clear directions on how to remove 127.0 0.1 proxy server setting virus. Dive into this comprehensive guide to not only understand its impact but also to find a step-by-step solution to eliminate it from your computer seamlessly. Your pathway to a smoother, virus-free computing experience starts here.
Methods for Removing 127.0.0.1 Proxy Server Virus on Windows 10
You can approach the removal of proxy malware from your computer through two main avenues: The Task Manager and the Registry Editor. Here’s a breakdown of both methods.
Method 1: Remove the Malicious File from Your PC
Identifying and eliminating any malicious files on your computer is paramount. With Task Manager’s aid, you can swiftly locate and delete these files. Here’s a step-by-step process:
- Identify the Program Process ID (PID). Open Command Prompt as Administrator and enter: netstat -abno | findstr LISTENING | findstr :8080. Press Enter.
- This will display the PID. Subsequently, right-click on the taskbar and select Task Manager.
- Within Task Manager, navigate to the Details tab and search for the process that matches the PID.
- Right-click on the detected process and select Open file location. Proceed to delete the file.
- Return to Task Manager and terminate the process.
- To ensure all threats are gone, utilize an anti-virus tool like AdwCleaner to scan and cleanse your system.
Method 2: Remove Proxy Virus by Using Registry Editor
If the first method doesn’t solve the issue, employ this method to further tackle the proxy virus.
Step 1: Change the Value of Proxyenable from 1 to 0
Initiate this by adjusting the Proxyenable value located in the Internet Settings of Registry Editor for the Local machine, Current Users, and Users folders. Here, you’ll discover three distinct Internet Settings locations.
- Press the Windows key and type “Registry Editor”. Open it.
- Copy and paste this path into the address bar: Computer\HKEY_CURRENT_USER\Software\Microsoft\Windows\CurrentVersion\Internet Settings.
- Identify Proxyenable, right-click, choose Modify, and reset the value from 1 to 0.
- Repeat this for the subsequent paths, adjusting the value as before:
- Computer\HKEY_LOCAL_MACHINE\SOFTWARE\Microsoft\Windows\CurrentVersion\Internet Settings
- Computer\HKEY_LOCAL_MACHINE\SOFTWARE\WOW6432Node\Microsoft\Windows\CurrentVersion\Internet Settings
- Computer\HKEY_USERS.DEFAULT\Software\Microsoft\Windows\CurrentVersion\Internet Settings
- Computer\HKEY_USERS\S-1-5-18\Software\Microsoft\Windows\CurrentVersion\Internet Settings
- Computer\HKEY_USERS\S-1-5-21-3996546682-3735944086-698702116-1001\Software\Microsoft\Windows\CurrentVersion\Internet Settings
Step 2: Delete Proxyoverride and Proxyserver from Internet Settings
Post modifying Proxyenable in the previous folders, your next task is to locate and delete the Proxyoverride and Proxyserver entries within the Internet Settings directory.
Step 3: Change the Value of Proxysettingsperuser from 0 to 1
After accomplishing step 2, revisit the Registry Editor and navigate to the following: Computer\HKEY_LOCAL_MACHINE\SOFTWARE\Policies\Microsoft\Windows\CurrentVersion\Internet Settings. Within, locate Proxysettingsperuser, right-click, select Modify, and amend the value from 0 to 1.
Step 4: Change the Connectionsettings Value from 1 to 0
For this final step, browse to HKEY_LOCAL_MACHINE > SOFTWARE > Policies > Microsoft > Internet Explorer > Control Panel. Here, you’ll discover Connectionsettings. Right-click on it, select Modify, and change its value from 1 to 0.
Concluding this method, download and run a scan with AdwCleaner by Malwarebytes. Eradicate any detected malicious entities. The proxy virus should now be successfully removed from your system.
Frequently Asked Questions and Answers – FAQs
How do I clear my Proxy settings in Windows 10?
To reset your proxy settings, simply follow these steps: Press the Windows key and type “cmd”. This will bring up the Command Prompt. Once there, type in “netsh winhttp reset proxy” and hit Enter. Finish by restarting your computer.
How do I remove the script address 127.0 0.1 86?
To delete the script address 127.0.0.1:86, the Registry Editor is your tool. Here’s a simple guide: Start by pressing the Windows key and typing “Registry Editor”. Right-click on the appearing option and select “Run as administrator”. In the editor, paste the following path into the address bar:
HKEY_LOCAL_MACHINE\SOFTWARE\Policies\Microsoft\Windows\CurrentVersion\Internet Settings. Then, right-click on “ProxySettingsPerUser”, choose “Modify”, and change its value from 0 to 1.
In wrapping up, understanding how to remove 127.0 0.1 proxy server setting virus is crucial for maintaining your computer’s performance and security. This guide aimed to provide clear steps to help you navigate and resolve this issue. At Twistory, our mission is to keep you informed and empowered with quality content on all things tech. Don’t forget to explore our diverse range of blogs for more insights and expert advice. Your tech journey with Twistory is just getting started!


